
By Tomasz , August 19, 2022 · 11 min read
CMS Pages With Page Builder And Hyva
Page Builder comes with a set of tools that helps you build your storefront pages. The big advantage for you as a developer is the possibility to create new content types. It lets you to customize Page Builder to suit your needs. In our case we would like to create a new control with the help of the Adobe documentation and use Tailwind CSS to style our control. It retains all the benefits of using Hyvä Themes.
About Page Builder
Page Builder is the default content management system that comes with Magento Adobe Commerce. It has an easy-to-use interface that requires no technical knowledge about coding. The drag-and-drop page design allows to rapidly create pages, update them and maintain responsive design. The live preview allows seeing how the content will look on the storefront. As a result, store owners and managers are able to build pages independently, save time and keep updated content.
Everything we need to use Page Builder on our project is Magento updated up to version 2.4.3. Using this tool does not force you to rebuild all existing pages because the content created in WYSIWYG will be transferred to Page Builder as HTML Code. It is built-in content type. We are still able to edit our previous content.
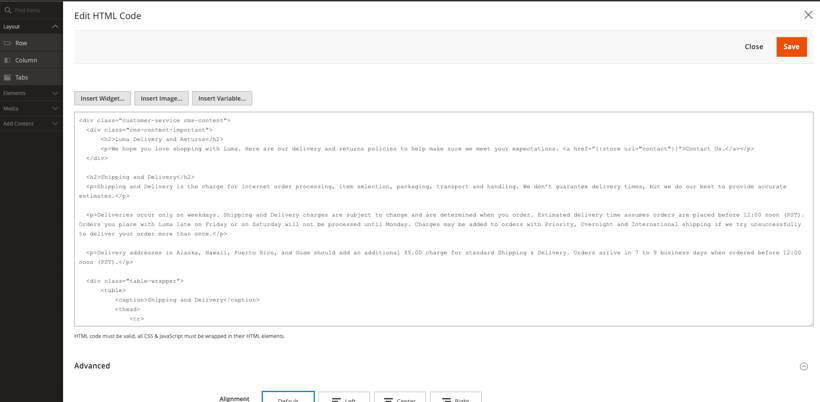
Page Builder “HTML Code”
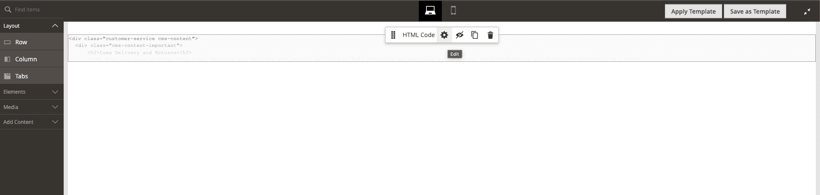
Editing content
Hyva Themes
Hyvä Themes is a new way to build out storefronts for Magento 2. Hyvä uses two modern dependencies: Tailwind CSS and Alpine.js. In effect, the Magento frontend is very light and our site loads faster. This is important because performance affects the SEO ranking.
I recommend updating your Hyvä version to 1.1.9 otherwise you will need to install an additional Page Builder module for compatibility with Hyvä. So now we can use Page Builder with Hyvä and keep all the benefits. If you would like to find out more information about Page Builder and Hyvä Themes, just watch “Hyvä Meetup”. John Hughes explains how the module for Hyvä works, mentioning rebuilt styles, keeping performance benefits, and overriding content types.
Let’s have a look at how we can create our own content type. For this, we are going to use an example from the Page Builder documentation. Please follow the instructions and compare with my code. I hope my advice helps you build Quote controls quicker.
1. Introduction
We start with short information about our example. The first step to building a content type is to create a new module, located in the directory app/code. If you use Visual Studio Code I recommend you use the MagentoWizard extension for that.
This extension automates some repeating tasks. In this section, we will find out more about the next creation steps. Pay attention to the file structure. There are many catalogs and it is very easy to make a mistake. You do not need all of them. We are going to pick only what is needed to create the first control in order not to make it complicated.
2. Configuration
Configuration files include a bunch of things. You are going to know them deeper but for now, compare my configuration with that from the documentation.
preview_componentMagento_PageBuilder/js/content-type/previewAdd componentsPlease pay attention to lines 20 and 21, and make sure your paths are correct, it is very easy to make a mistake in a nested catalog.
3. Add templates
preview.htmlmaster.htmlLet’s compare preview templates.
<render args="getOptions().template" /><render args="getOptions().template"></render>Add styles4. Add components
example_quote.xmlexample_quote.xml5. Add a form
example_quote.xmlData flow
Add stylesAdd templates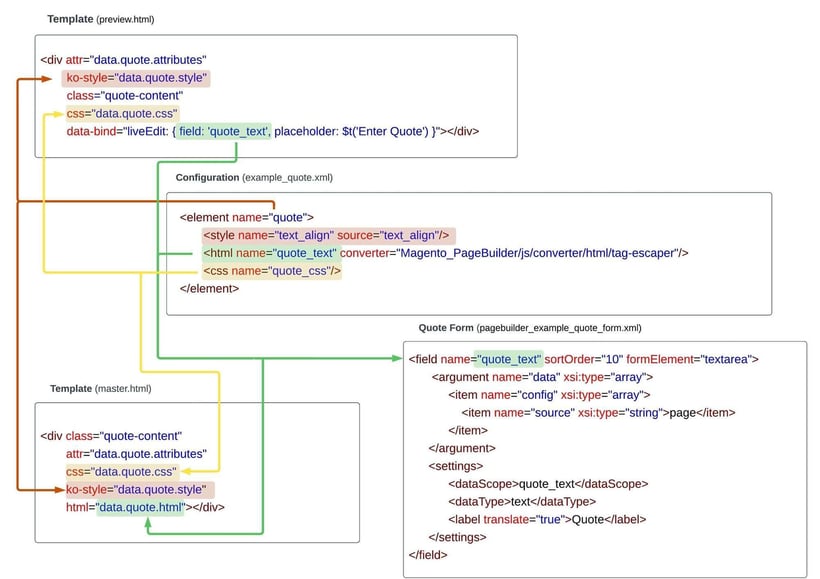
6. Add styles
adminhtml/web/css/source/content-type/example-quote/_import.lesspagebuilder_example_quote_form.xmlpage-builder-quote.css{PATH_TO_YOUR_THEME}/web/tailwind/components/frontend/web/css/source/content-type/example-quote/frontend/web/css/source/content-type/PATH_TO_YOUR_THEME}/web/tailwind/tailwind-source.csspage-builder-quote.css@import url(components/page-builder-quote.css);@applycssmaster.htmlpage-builder-quote.css.Example of a master template.
However, this solution has one drawback. If we save some content on our page and we want to edit it again we get a reconverted master template from the database in the preview. It means all classes will be added to nodes. It does not affect the preview because their classes are not recognized on the admin panel.
Effect
Preview
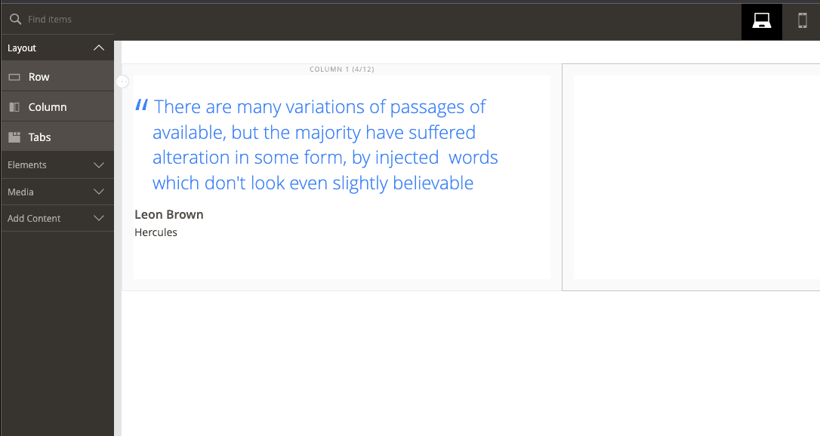
Example of the frontend

We have got almost the same view on the admin panel and the frontend. Our content type is done. We just need to create an icon and add it to the configuration file. Try to edit our control, for example by adding a custom toolbar for the quoted text. I recommend creating a few simple content types and then trying to extend them. The Adobe documentation includes topics that will help you expand your knowledge. You can check Page Builder examples to learn more from source codes.
I give you access to our own repository with this example to compare.
Custom content types are a very powerful feature of Page Builder. We are not limited to using built-in tools. You can build content types customized to your project. That will definitely improve your work.
Common issues
In my case, I use PHP 7.4 and Magento 2.4.4. When I tried to add a content type by dragging on the stage, it did not appear. I was still able to see the HTML structure when I inspected the page. To solve the issue I eliminated self-closing tags. You can read more in this thread on Github.
Would you like to innovate your ecommerce project with Hatimeria?

A photography fanatic and software magician. He can capture stunning shots with his camera and breathtaking code with his keyboard. His coworkers say he has a tendency to see the world through a lens and approach coding problems with an artist's eye.