
By Hubert, December 11, 2023 · 9 min read
Exploring the Power of Expo Router v2: What's New and How to Get Started
As the world of app development continues to evolve, finding a routing solution that seamlessly connects mobile and web applications has become a top priority for developers. That's where Expo Router v2 steps in – the latest version of Expo's powerful routing library that redefines the way we navigate through our React Native apps. In this blog post we'll dive into the power and capabilities of Expo Router v2. Whether you're a seasoned React Native developer or just beginning your journey, this feature-packed routing solution has something to offer for everyone.
What’s new in Expo Router v2?
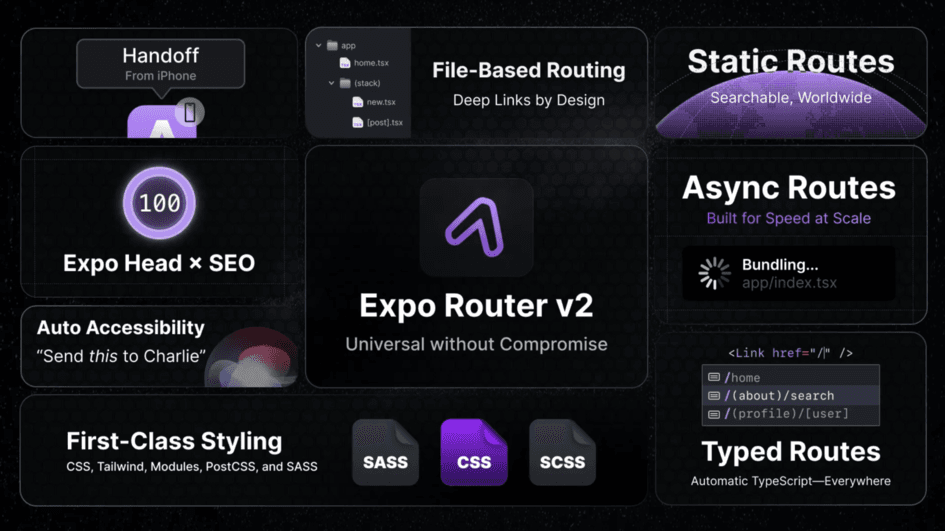
Expo Router v2 introduces a lot of exciting new features that elevate the app development experience to a new level. Let's take a look at the key enhancements:
- Auto Typed Routes
- First-class support for aliased imports
- Static Routes
- Async Routes
- Reanimated Shared Element Transitions
- Improved Error Handling
- Universal Links
- first-class support for CSS Modules, Sass and PostCSS configuration files and many more.
Let’s explore these new features by creating a simple application. To start out I’ll be using the Expo starter, which will have all necessary dependencies already installed.
Scaffold the application by running:
File-based routing
As you may have noticed, the above command generated us a project with an app folder. What is striking here is the specific naming of files. Expo Router uses file-based routing, so when creating applications with it, we have to stick to a proper file naming convention.
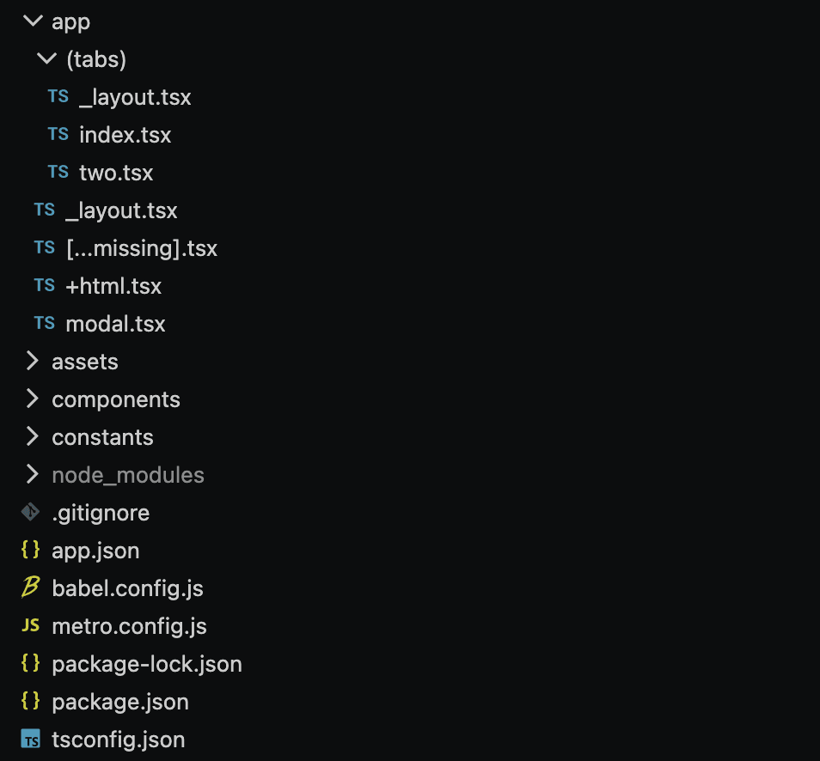
When we create a file in the app folder and export default a React Component from it, it automatically becomes a route in our application. For example:
- matches
app/products.tsx/products - matches
app/profile/index.tsx- files named/profiledo not add any segment to the path.index
Other typical file naming in Expo Router:
- - file defining a layout for child routes. It can be really useful with
_layoutor<Tabs />for nesting navigators.<Stack /> - - file defining a dynamic route. Example:
[id]matchesapp/products/[id].tsx,/products/1etc./products/2 - - file defining a dynamic route, but matches multiple slugs. Example:
[…missing]matchesapp/profile/[...routes]./profile/a/b/c - - directory names wrapped in parenthesis prevent a segment to appear in the URL. It can be useful in grouping and organizing your routes or creating a layout without affecting the URL.
(tab) - - file defining a layout for the default HTML wrapper for child routes - it can be useful for static routes (if you also want to support Web).
+html
Move the app to top-level src directory
Once we understand the file naming conventions, we can proceed to explore the capabilities of the new version of Expo Router.
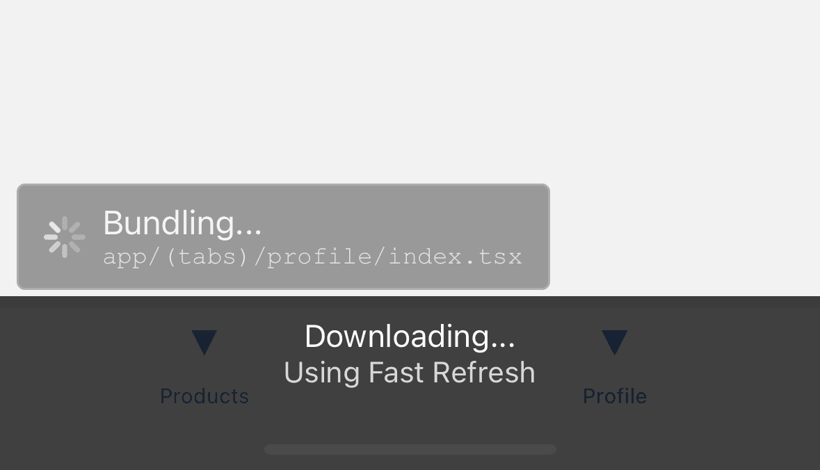
appsrcsrcapppublicAsync Routes
One of the exciting new features in Expo Router v2 is "Async Routes", designed to enhance the scalability and upgrading process of your app. It basically is a first-class lazy bundling, allowing you to incrementally bundle your app page by page instead of all at once. This is especially beneficial for large teams working on massive apps with thousands of screens. When using Expo Router v2, any errors that might occur are deferred until you load a specific page. This means that even if one page out of a thousand has an error, it won't bring down the entire app. With Async Routes, you can progressively upgrade your app over time without worrying about major disruptions. It's essential to note that Async Routes is currently available as an experimental feature in Expo Router v2. You can enable it during development mode to experience its benefits. While it doesn't support static rendering due to constraints around React Suspense, it promises to bring even more stability and scalability to your app. Let’s configure the async routes in our application to see it in action. All we need to do is enable it in the app.json:
Auto Typed Routes
<Link />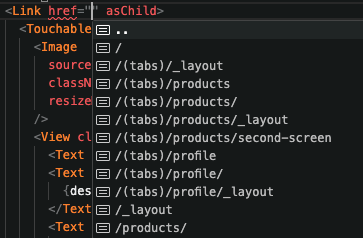
Query Parameters
useLocalSearchParamsuseGlobalSearchParams- useLocalSearchParams:
useLocalSearchParamsIn nested apps where multiple pages are mounted simultaneously, useLocalSearchParams proves to be an essential tool. For instance, if a stack contains the previous page and the current page in memory when a new route is pushed, useLocalSearchParams comes in handy to manage the search parameters of the current component with precision.
- useGlobalSearchParams:
useGlobalSearchParamsuseLocalSearchParamsuseGlobalSearchParamsReanimated Shared Element Transitions
The newer version of Expo Router now fully supports Reanimated Shared Element Transitions. For those of you who don’t know, Shared Element Transitions is a feature that allows you to smoothly transform a component from one screen into a component on another screen, creating a seamless and visually captivating experience for your users.
sharedTransitionTagsharedTransitionTagreact-native-reanimatedWe also need to add the Babel plugin to babel.config.js:
Then, restart your server and clear the cache:
I’ve prepared a simple application with a list of products and a simple product details page to showcase the Shared Element Transitions. Here’s what the app looks like:
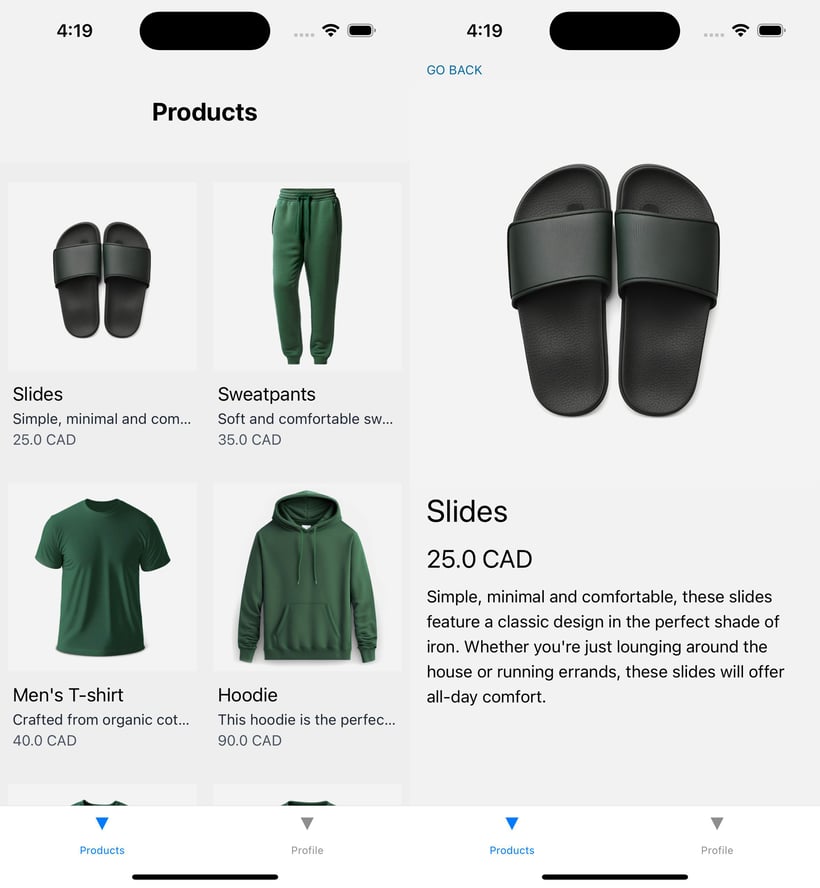
Let’s start implementing the Shared Element Transition. The product image seems to be a good candidate to test out this feature. First, we need to import Animated from react-native-reanimated for both Product List Item component and Product Details Page.
Then, let’s use the <Animated.Image /> component - a wrapper around the regular React Native <Image /> component - that will handle the transitioning between screens.
Product List Item component:
Product Details Page:
sharedTransitionTag<Animated.Image />Product List Item component:
Product Details Page:
And that’s all it takes, let’s see the result:
Conclusion
Expo Router v2 is a game changer for React Native developers, offering a feature-packed and user-friendly routing solution. With Auto Typed Routes, developers benefit from auto generated static type definitions for each route, streamlining the development process. Async Routes enable incremental app bundling and progressive upgrades, enhancing error handling and stability. Reanimated Shared Element Transitions bring elegance to app navigation, providing smooth transformations between screens for a captivating user experience. Expo Router v2's hooks, useLocalSearchParams and useGlobalSearchParams, effortlessly handle query parameters. Expo Router v2 can elevate your app development with its powerful capabilities, file-based routing and support for CSS modules, Sass and PostCSS. I encourage you to try it out!
Are you ready to revolutionize your app navigation? Dive into Expo Router v2 today and explore the endless possibilities it brings to your projects. For any questions, assistance, or to share your experiences, feel free to reach out to us.
Would you like to innovate your ecommerce project with Hatimeria?

An MMA enthusiast and code ninja. He has a black belt in both coding and roundhouses. When he is not delivering top-notch software, he can be found at the gym, honing his skills and training for his next fight.